The wide world of custom Minecraft skins is only getting larger, but sometimes, players and creators need to fine-tune their skins or add a personal touch.
In addition to Minecraft Bedrock Edition’s built-in skin creator and editor, Java Edition players can edit their skins in a few different ways. It’s possible, of course, to directly edit the .png file of their skin, but doing so requires expertise with an image editing program and isn’t suitable for all users.

Fortunately, plenty of alternatives exist and have made it easier than ever to edit and upload skins.
Minecraft: Editing skin using The Skindex
</figcaption></figure>
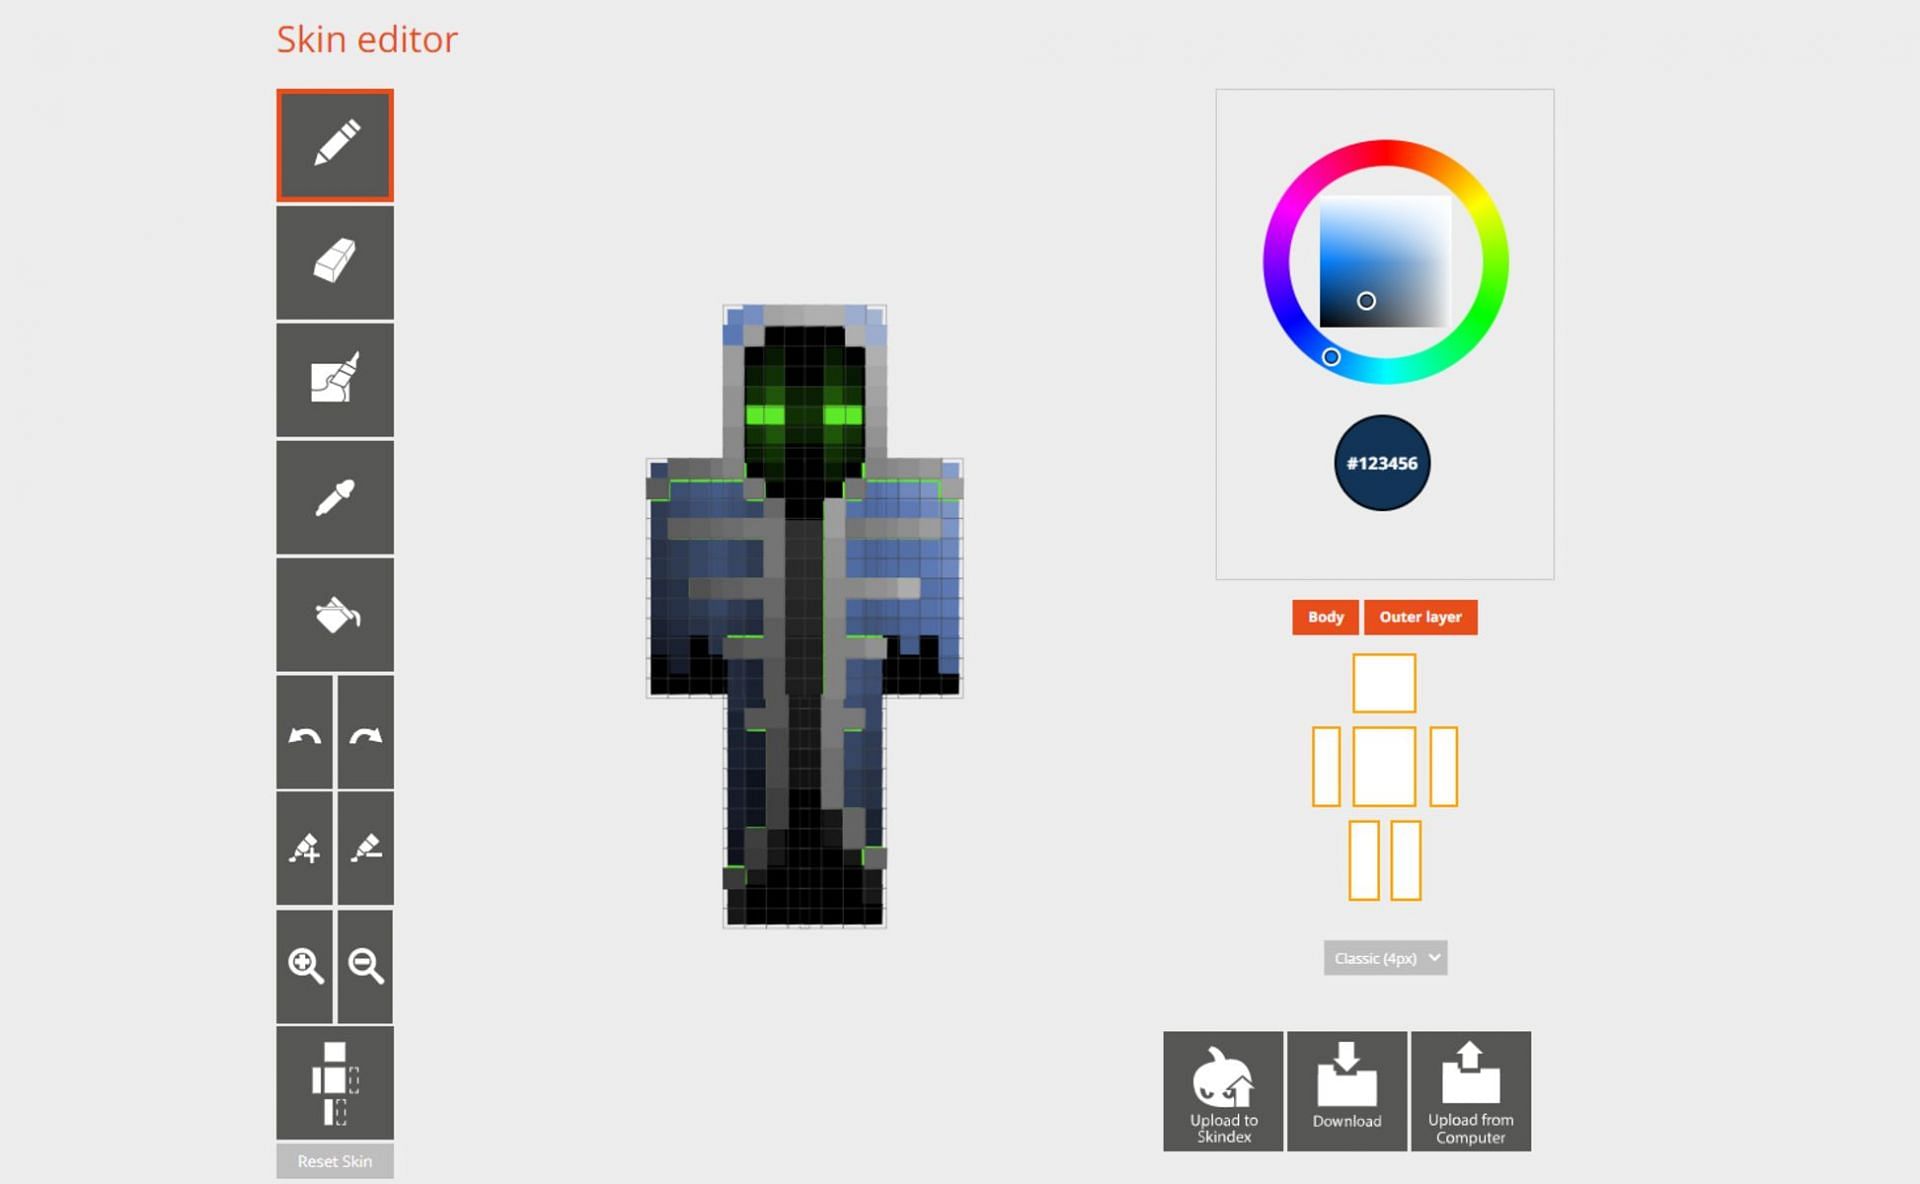
<p>One of the most easy-to-use and helpful editors currently available is The Skindex, one of the largest Minecraft skin repositories online. The site allows users to upload their custom skins online, download others’ skins, and edit skins.</p>
<p>Gamers can either edit a skin they find on the site directly or upload one of their own within the editor. It all comes down to what they are looking for.</p>
<p>Below, players can find a few short steps showing how to edit and save their skin by using The Skindex’s skin editor:</p>
<div class=)
- Head to Minecraftskins.com to open the page for The Skindex.
- Select a skin from the site’s collection or head directly to the Editor tab.
- If players select a skin, they can choose “edit skin” on the right to open the editor.
- Once the editor is open, they can begin using the tools and color palette to edit their skin. If users would like to upload a skin they have on their device, they can use the “upload from computer” option.
- Once they are satisfied with their changes, they can select “download” to download a .png file that can be imported into the game.
Once the .png file has been downloaded, all that is required is for Java gamers to head to the game’s site, log in with their credentials, and upload the file.
For Bedrock users, it is possible to import the new skin by selecting Profile > Classic Skins > Owned > Import. However, it’s important to remember that Bedrock has a limited number of skins that can be saved.
Also Read
Article Continues below
Sadly, this method will not work on Bedrock Edition on consoles but should work correctly on Windows 10 and Pocket Edition.